Headlight Restoration - Chevy Traverse in Decatur
From Foggy to Factory-Fresh
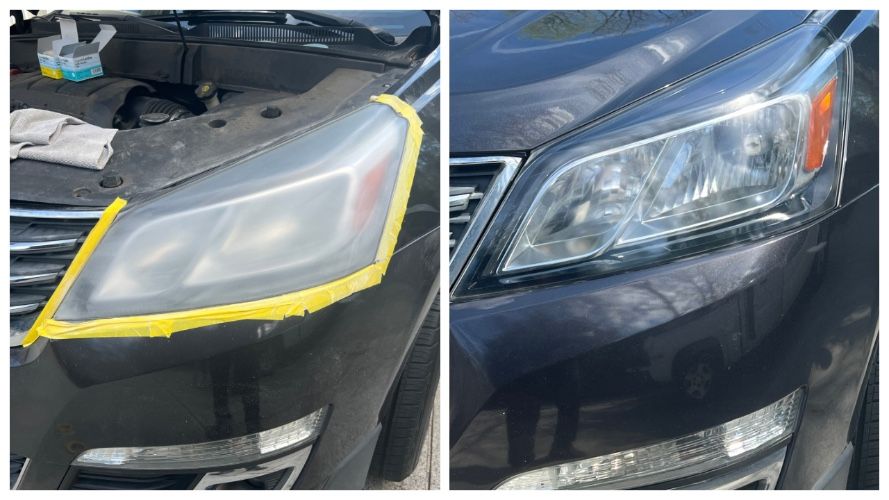
A Chevrolet Traverse came in with oxidized, heavily clouded headlight lenses. Here's the full process Red Clay Detailing used to bring them back to life, from cut to coating.
If you've ever driven at night and noticed your headlights aren't throwing light as far as they used to, the problem may not be the bulbs. It's the lens. UV exposure, road debris, and time all conspire to cloud and oxidize plastic headlight housings. On this Chevrolet Traverse, the lenses were long overdue for a full restoration.
Step-By-Step Process
1 Tape off the trim & paint
Before any abrasive touches the lens, all surrounding trim and painted panels are masked off. Sanding without protection risks scratches and damage that would cost far more to fix than the headlights themselves.
2 Sand the lens
Sanding starts with 320 grit to strip the old failed coating entirely. From there, progressively finer grits smooth the surface back out — working up through 600 and 800 until the lens is uniformly smooth.
3 Surface prep & wipe-down
Once sanding is complete, the lens is wiped down with isopropyl alcohol or a dedicated surface prep cleaner. This removes all sanding dust and residue so nothing gets trapped under the new coating.
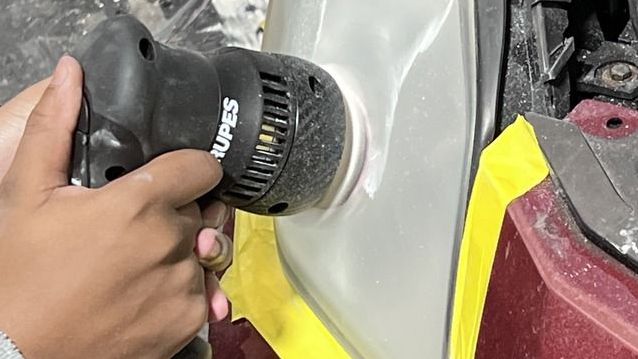
4 Apply the vapor coating
The final step uses a vapor-based coating method. The chemical is heated in a sealed container and applied by nozzle across the lens surface. Heat is key. The hotter the chemical, the better it flows and self-levels across the lens.
The sanding progression
Working through the grits in the right order is what separates a clean result from a hazy one. Each pass removes the scratches left by the previous grit, so rushing or skipping steps leaves visible marks under the final coating.
START 320 grit→600 grit→800 grit→SMOOTH
320 is the workhorse. Its job is to fully remove the oxidized factory coating. By 800, you should have a lens that looks uniformly hazy and free of pitting or peeling. That haze disappears completely once the coating goes on.
Why the vapor method?
Rather than a brush or spray can, the vapor coating method heats the protective chemical before application. As it exits the nozzle, it flows across the lens in an even, self-leveling layer. The result is a factory-quality clarity that resists UV damage going forward.
"As it heats up, the hotter it is, the better it flows. After that point, you have brand new headlights."
The whole process from masking to final coat is methodical and precise. Done correctly, there's no need for compounds, buffing, or any other steps. Just tape, sand, prep, and coat.